Home / Resources

Our Resources

Explore our guides, insights, and expert resources to help you navigate your Canadian immigration journey with confidence.

How to Create Your IRCC Secure Account Accounts & Documents
Mar 18, 2026

How to Create Your IRCC Secure Account

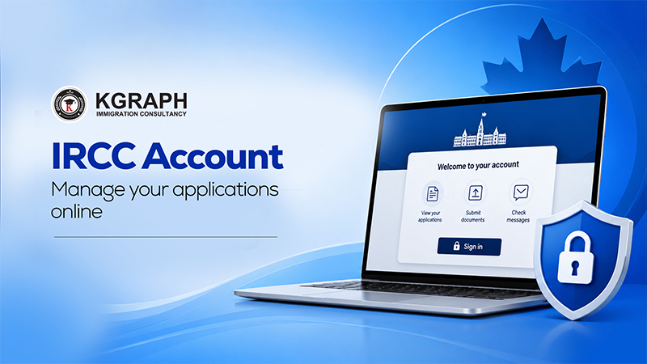
Navigating the immigration process to Canada begins with understanding how to interact with Immigration, Refugees and Citizenship Canada (IRCC) online. It is critical to know that IRCC does not currently have one universal account. Instead, the department operates several separate systems that are not interchangeable. This guide focuses specifically on the IRCC secure account, explaining what it is, how to create one, and how to troubleshoot common issues. In this guide Understanding IRCC Systems What is the IRCC Secure Account? What is GCKey? Preparation Before Registering Step by Step: Creating an Account with GCKey Step by Step: Registering with an Interac Sign-In Partner GCKey versus Sign-In Partner Managing Your Account Account Recovery and Troubleshooting Where to Get Help Frequently Asked Questions Understanding IRCC Systems IRCC operates multiple portals based on the type of application you are submitting. The IRCC secure account is the system that uses a GCKey or a Canadian Interac Sign-In Partner for access. This account is used for Express Entry, work permits and extensions, International Experience Canada (IEC), visitor records, study permit extensions, some study permits and visitor visas, citizenship certificates, the Interim Federal Health Program (IFHP), and more. Other systems include the IRCC Portal, which uses email based credentials and is used for some visitor visa and study permit applications, as well as asylum claims. The Permanent Residence Portal is a separate system for most non Express Entry PR applications, family sponsorship, PR cards, and Permanent Resident Travel Documents (PRTDs). The PR Confirmation Portal is initiated by IRCC after PR approval to confirm presence, provide an address and photo, and get an electronic Confirmation of Permanent Residence (COPR). Finally, the IRCC Portal New version is being rolled out in stages, initially for certain visitor visa applicants and adult passport renewals, with the intention of eventually becoming a single window. Always start from the official instructions for your application type instead of creating an account based only on its name. What is the IRCC Secure Account? The IRCC secure account is an online portal where you can apply for, manage, or receive information about supported immigration, temporary residence, citizenship, and refugee health applications. You must register and sign in using either a GCKey username and password or a Canadian Interac Sign-In Partner. It is important to keep using the exact method the account was registered with because the credential becomes tied to your IRCC profile. If your application type is not listed above, check that program's specific instructions, as another portal may be required. What is GCKey? A GCKey is a Government of Canada sign-in credential consisting of a username and a password. It is not an IRCC account by itself. After creating a GCKey, you must still register the IRCC secure account so the GCKey is matched to your IRCC profile. Anyone in any country can create a GCKey. No Canadian bank account, address, or Social Insurance Number (SIN) is required. A GCKey can be used for more than one federal service that supports it, but you must register separately for each service. You can create more than one GCKey, but once a GCKey is linked to an account, you must use that same GCKey for it. Preparation Before Registering Before you begin, ensure you are using a current version of Safari, Chrome, Firefox, or Edge, with JavaScript and cookies enabled. You will need a stable email address for recovery and two-factor authentication, as well as a secure place to record recovery information. Always start from the official IRCC registration page rather than bookmarking signed in pages. For a GCKey, you need a unique username, a password meeting the on screen checklist, recovery questions and answers, a recovery email, a two-factor method, and a safe place to store the five recovery codes issued after two-factor setup. For an Interac Sign-In Partner, you need a Canadian bank account at a participating institution, online banking access, and the bank's normal online ID and password. You do not need a Unique Client Identifier (UCI), an application number, or a personal reference code just to create the account. A personal reference code is optional and expires 60 days after issue. Linking an existing application requires entering details exactly as they appeared on the original application or the latest updated information. Security reminder: Never share your GCKey username, password, recovery answers, two-factor codes, or recovery codes with anyone — including people claiming to represent IRCC or GCKey. Treat any unexpected request for these details as fraudulent. Step by Step: Creating an Account with GCKey Confirm the secure account is right for your application using the account finder or program instructions. Select "Register with a GCKey username and password" on the official IRCC registration page (canada.ca/en/immigration-refugees-citizenship/services/application/register.html). Sign in with an existing GCKey or select Sign Up on the Welcome to GCKey page. Accept the GCKey terms and create the credential. Select the GCKey option, Sign Up, read and accept terms, create a username, create a password, create recovery questions, enter a recovery email, and complete two-factor authentication when prompted. Avoid using personal information like your name, SIN, address, or email in the username. Create the IRCC secure account profile after creating the GCKey. This is required even if you already had a GCKey. Set up two-factor authentication, which is required for GCKey. Methods include an authenticator app on a phone or tablet, an authenticator app on a desktop or laptop, or a one time code by email. Both methods use six digit codes. Save the five recovery codes somewhere safe. Step by Step: Registering with an Interac Sign-In Partner On the IRCC registration page, select "Register with Interac Sign-In Partner". Choose your participating institution from the list. You will be redirected to the bank's sign in page. Sign in with your normal online banking ID and password. Accept Interac terms if prompted on first use, complete any bank authentication, and you will be redirected back to IRCC. Follow the prompts to create the secure account profile. Interac does not receive your banking login or financial information. IRCC does not share your IRCC information with the bank, and the bank does not share banking information with IRCC. For a current list of participating financial institutions, visit the Interac Sign-In Service page. If your institution is not listed, register using GCKey instead. GCKey versus Sign-In Partner Feature GCKey Interac Sign-In Partner Suitability Applicants outside Canada, those without a participating Canadian bank, or those who prefer not to tie access to a banking relationship. Users with a Canadian account at a participating bank and online banking access. Availability Can be created from any country. Requires an account with a participating Canadian institution. Continuity Must use the same method every time. Must use the same method every time. Managing Your Account Inside the account, you can start, complete, and submit supported applications. You can also pay fees. For Temporary Resident Visas (TRVs), study permits, work permits, Electronic Travel Authorizations (eTAs), Employer Portal, Express Entry, citizenship certificates, and record searches, payment is made directly in the online application before submission. For some other applications, you may need IRCC's separate online payment service and must attach the receipt. You can upload documents during an application. After submission, you can usually upload only when IRCC has requested it and provided an upload field. To upload requested documents, sign in, find the application under "View the applications you submitted", select "Check full application status", then "View submitted application or upload documents". Go to the requested document section, upload the file, confirm it shows "Uploaded, not submitted to IRCC", click Next, enter your name as a signature, answer the security question, click Sign then Transmit, and confirm the success message.jpg, .png, .doc, .tiff, or .pdf formats. You can check your application status and read IRCC messages. You can link an existing application by entering information exactly as on the original application or the latest updated information. You have five linking attempts before a 24 hour lock. An online application can take up to five days to appear. Once linked, IRCC sends messages to the account instead of paper. If an applicant using a representative links it to their own account, the representative loses access. Account Recovery and Troubleshooting 1Recovering a GCKey Lost username, recovery email works: Go to GCKey sign in, select "Forgot your username?", enter the recovery email, continue, check the Government of Canada email with the username, and sign in. Lost username, no recovery email access: Create a new GCKey, create a new IRCC secure account, then recover or link existing submitted applications. Unsubmitted drafts may not be recoverable. Lost password, recovery email available: Select "Forgot your password?", enter the username, choose email reset, enter the recovery email, get the code, enter the code, answer the recovery question, and create a new password. Lost password, no recovery email: Use the Recovery Q&A and create a new password. Lost both: Recover the username first, then reset the password. 2Lost Two-Factor Method Recovery codes available: Sign in with GCKey, select Recover account on the two-factor page, enter one saved recovery code, select Change your two-factor authentication, register the replacement method, and save the new recovery codes. No method and no recovery codes: Create a new GCKey, create a new IRCC secure account, set up two-factor again, save the new codes, and recover or link applications. 3Revoked or Expired GCKey A revoked GCKey cannot be recovered. It may be revoked if compromised or unused for two years. Create a new credential and re-register. 4Changing Banks or Losing a Sign-In Partner To switch partners, select Canadian Interac Sign-In Partner, then Switch My Sign-In Partner, and follow the Interac prompts. If the bank or partner is removed or inaccessible, create a new account, select "Add (link) your application to your account," enter the application details, and use the passport or travel document information that appeared on the application. Submitted applications, messages, and updates are not lost, but an unsubmitted application must be restarted. 5Common Problems Login loop or blank page: Use the latest browser, do not use a bookmark, delete saved account bookmarks, close the browser, reopen and clear cache, close again, reopen and sign in. If it continues, submit the IRCC web form under "Technical difficulties" with network or VPN details and screenshots... "Too many attempts": Close the window or tab and try again in a new session. Site unavailable or maintenance: Try later. Session expired: Sign in again. Application missing after account reset or changing credential: Sign in and use link application. Have a copy of the submitted application to enter information exactly. Cannot link: Use information exactly as submitted, use old passport details if those were used, use latest information if IRCC was formally told of a change, wait up to five days, and stop after five attempts to avoid a 24 hour lockout. No upload button after a request: Follow the request letter. If still unavailable, use the IRCC web form (canada.ca/en/immigration-refugees-citizenship/corporate/contact-ircc/web-form.html) with the correct application type and screenshots. "Uploaded, not submitted to IRCC": Finish with Next, signature, security question, Sign and Transmit, and confirm the success message. Personal reference code does not work: It expires 60 days after issue and is not required to start. Where to Get Help The GCKey Service Desk helps only with GCKey and two-factor issues and cannot access your IRCC application. They are available 24 hours a day, 7 days a week. Canada and US: 1 855 438 1102 TTY/TDD: 1 855 438 1103 Outside Canada and the US: see the current number at canada.ca/gckey Use the IRCC web form for technical problems, directed document submission, updates, applications outside processing times, and program questions. Frequently Asked Questions Q: What happens if I forget my GCKey username while messages are in the old account and I cannot link an IEC application? You will need to create a new GCKey and a new IRCC secure account, then link your existing submitted applications. Ensure you enter the information exactly as it appeared on the original application. Q: I closed the Canadian bank used as my Sign-In Partner after leaving Canada and cannot access an ongoing Express Entry application. What should I do? You must create a new account using a GCKey, select "Add (link) your application to your account," and enter the application details. Use the passport or travel document information that appeared on the application. Q: The site keeps returning to the login page. How can I fix this? Use the latest version of your browser, do not use a bookmark, delete saved account bookmarks, close the browser, reopen and clear the cache, close again, reopen, and sign in. If the issue persists, submit the IRCC web form under "Technical difficulties". Q: My PR application is in the PR Portal and cannot be found or linked in the IRCC account. Why? The PR Portal is a completely separate system from the IRCC secure account. Applications submitted in the PR Portal cannot be linked to or managed within the IRCC secure account. Q: I closed the bank used as my Sign-In Partner and want to switch to GCKey or another bank without losing the application. Is this possible? Yes. Create a new account using your new preferred method (GCKey or a new Interac Sign-In Partner), then link your existing submitted applications to the new account. Submitted applications, messages, and updates are not lost. Q: The system cannot find my application when linking, and it is unclear whether to enter the sponsor's or the principal applicant's details. When linking an application, you must use the information exactly as it was submitted on the original application. You may need to try both the sponsor's and the principal applicant's details, but remember you only have five attempts before a 24 hour lockout. Details like these are where applications come apart. Our consultants have handled these documents for over a decade, and we can check yours before you file.Start Your Free Initial Eligibility Assessment Prepared by George Paul, KGraph Immigration Consultants. Last updated July 2026. This guide is for general information purposes only and does not constitute legal or immigration advice. Related Articles Check Your IRCC Application Status IRCC Photo Specifications Create Your Express Entry Profile Express Entry Service Immigration Medical Exam
Read More
IRCC Photo Specifications for Immigration Applications Accounts & Documents
Mar 22, 2026

IRCC Photo Specifications for Immigration Applications

Welcome to the complete guide to Canadian immigration, citizenship and passport photo requirements. At KGraph Immigration, we have helped more than 10,000 clients successfully navigate the Canadian system, maintaining a 98% success rate and a 4.9 Google rating. One of the most common reasons for processing delays is submitting the wrong type of photograph. In this guide Core Photo Requirements by Application Type Permanent Residence and PR Card Photos Express Entry Digital Photographs Canadian Citizenship Photographs Canadian Passport Photographs Visitor Visa, Study Permit and Work Permit Photos Biometrics Photograph versus Application Photograph Questions People Actually Ask Canada does not use a single universal photo specification for every application. The rules for permanent residence differ from the rules for citizenship, and both differ from passport and visitor visa requirements. This page breaks down the exact millimetre sizes, pixel dimensions, file sizes and rules you need to know for your specific application. Core Photo Requirements by Application Type The most important differences depend on what you are applying for. The dimensions below are width by height unless expressly stated otherwise. (Canada) Application or document Printed photo size Digital dimensions Photo age Background Permanent residence or PR card Exactly 50 mm wide by 70 mm high 715 by 1000 to 2000 by 2800 pixels Maximum 12 months old Plain, untextured white Citizenship grant Exactly 50 mm by 70 mm At least 420 by 540 pixels Maximum 6 months old Plain white or light coloured Canadian passport, paper route Exactly 50 mm by 70 mm Not applicable Maximum 6 months old Plain white or light coloured Canadian passport, online adult renewal Not expressed in millimetres 1200 by 1800 minimum to 3000 by 4500 maximum, portrait Maximum 6 months old Plain white or light coloured Visitor visa, paper study permit or paper work permit At least 35 mm by 45 mm No single universal online standard published Maximum 6 months old under the TRV specifications Plain white or light coloured IEC work permit digital photo At least 35 mm by 45 mm composition At least 420 by 540 pixels Not separately stated in the IEC digital section Follow the application instructions Permanent Residence and PR Card Photos Immigration, Refugees and Citizenship Canada (IRCC) maintains consolidated rules for permanent resident photos. These apply to applications submitted through the Permanent Residence Portal, applications for a new, renewed or replacement PR card, and paper applications where the program still accepts printed photos. (Canada) 1Online PR or PR Card Application You must submit one digital photo in the Permanent Residence Portal. A commercial photographer or professional studio must take it. IRCC accepts either an original professional digital photograph or a scan of a professionally printed photograph. IRCC does not accept a phone or camera photograph taken of a paper print. You may use a scanner application on a phone, tablet or computer to scan the professional print. (Canada) The digital photo must meet these specifications: Minimum dimensions: 715 pixels wide by 1000 pixels high Maximum dimensions: 2000 pixels wide by 2800 pixels high Maximum file size: 4 MB Format: .jpeg or .jpg (We advise applicants to use JPG or JPEG unless the actual upload field expressly accepts PNG) Colour or black and white is acceptable The photograph must have been taken no more than 12 months before the application IRCC gives a pixel range for digital photos, not a required measurement in millimetres. The 50 mm by 70 mm measurement applies expressly to printed PR photos. Do not worry about millimetre sizes for the digital file itself; the portal validates pixels and file size. (Canada) 2Background and Image Quality Your digital photo must have a plain, untextured white background with a clear difference between you and the background. It needs clear, sharp focus, uniform lighting, natural skin tones, and no shadows, glare or flash reflections. Do not use digital alterations. IRCC treats changes to colour, brightness, contrast, sharpness, background, clothing or facial appearance as alterations. Cutting and pasting yourself against a new white background is also considered an alteration. (Canada) 3Expression, Glasses and Head Coverings You must have a neutral expression, keep your mouth closed, keep your eyes open, and look directly at the camera. Have your face and shoulders centred and squared to the camera. Avoid smiling, frowning or tilting your head. Glasses are allowed when your eyes are clearly visible, there is no glare on the lenses, and the glasses do not obstruct your eyes. Sunglasses and tinted prescription lenses should not be used. A head covering is allowed when it is worn daily for religious or medical reasons. Your full face, including the area around your ears, as well as your shoulders and background, must remain visible. The covering must not cast shadows or distort the image. Hair should be kept away from your face so the edges of your face are visible. (Canada) 4Photographer Information for Online Applications The portal has separate fields for the front and the back of the photo. For an original digital photograph, the supporting document uploaded as the back must include your name, your date of birth, the date the photo was taken, the photographer or studio name, the complete studio address, and confirmation from the studio, such as a receipt. For a scanned professional print, the scanned back must show your name, your date of birth, the date the photo was taken, the studio name, and the complete studio address. No applicant signature or guarantor signature is required. (Canada) 5Printed PR and PR Card Photographs If you are submitting a paper application, you must provide two identical photos. The exact photo size must be 50 mm wide by 70 mm high, with a head height of 31 mm to 36 mm measured from chin to crown. Photos must be no more than 12 months old. Colour or black and white is acceptable. They must be professionally printed on plain, high quality photographic paper. Home printed or heavyweight paper photos are not accepted. The background must be plain, untextured and white. (Canada) On the back of one photograph, include the name and date of birth of the person shown, the photographer or studio name, the complete studio address, and the date the photograph was taken. The photographer may stamp or handwrite the information. Stick on labels are not accepted. A guarantor signature is not required. (Canada) 6PR Card Fees There is no separate IRCC photo fee. The commercial photographer's charge is a private business charge and IRCC does not set an official amount. For the PR card itself, there is no separate fee for your first PR card when the address and photo are supplied within 180 days of becoming a permanent resident. A renewal or replacement PR card application costs CAN$50 per person. (Canada) Express Entry Digital Photographs At the Express Entry permanent residence application stage, IRCC states that a personalized document checklist is generated after you complete the online application. A digital identity photo is required only if the personalized checklist includes it. (Canada) The current public Express Entry application page does not publish one specific pixel dimension, head size or file format table. You should follow the requirements displayed in your personalized digital photo upload field. After approval, the photograph uploaded in the PR Confirmation Portal for the first PR card is a separate step and uses the current 715 by 1000 to 2000 by 2800 pixel, maximum 4 MB standard. (Canada) Canadian Citizenship Photographs IRCC expressly warns that citizenship photo specifications are different from Canadian passport specifications. Online Citizenship Grant Application Submit one colour digital photo (preferred) or one digital black and white photo. A commercial photographer or studio must take it. IRCC prefers the original digital file from the photographer. If the photographer cannot provide a digital file, you may scan or photograph the professional printed photo, although IRCC says the original professional digital file is safer. (Canada) The composition must correspond to 50 mm wide by 70 mm high, with a face height of 31 mm to 36 mm from chin to crown. The digital file must be JPG or JPEG with minimal compression, saved directly from the camera without alteration. It must be at least 420 pixels wide by 540 pixels high, approximately 240 kB, and a maximum of 4 MB. The photo must be no more than 6 months old, use a plain white or light coloured background, be clear and sharp, and show natural skin tones. You must show the face and shoulders straight on, with a neutral expression, eyes open and mouth closed. (Canada) Paper Citizenship Grant Application Submit two identical colour printed photos. They must be exactly 50 mm wide by 70 mm high with a face height of 31 mm to 36 mm. They must be taken within the previous 6 months, professionally printed on plain, high quality photographic paper against a plain white or light coloured background. (Canada) The printed photo must include the applicant's first and last name, the photographer or studio name, the complete studio address, and the date the photo was taken. Always check the current document checklist (CIT 0007) for exact instructions on whether this goes on one or both photos. Canadian Passport Photographs Paper or In Person Application For a new adult passport, child passport, and paper or in person renewal, submit two identical and unaltered printed photos. They must be exactly 50 mm wide by 70 mm high with a face height of 31 mm to 36 mm. They must be taken no more than 6 months before applying. They must be professionally printed on plain, high quality photographic paper against a plain white or light coloured background. (Canada) On the back of one printed photo, the photographer must write or stamp the date the photograph was taken, the photographer or studio name, and the complete studio address. For a new adult passport or child passport, the guarantor must write: "I certify this to be a true likeness of the applicant" and then sign the same photo. An adult using the simplified renewal process does not need a guarantor. (Canada) Online Adult Passport Renewal Only an eligible adult passport renewal submitted online uses the digital passport photo specifications. The digital photograph must be taken in person by a commercial photographer, be no more than 6 months old, and be the original camera file. It must be JPG or JPEG, have a 3:2 portrait aspect ratio, be at least 1200 pixels wide by 1800 pixels high, and be no larger than 3000 pixels wide by 4500 pixels high. The file must be between 200 KB and 5 MB. The chin to crown measurement must equal 45% to 50% of the total image height. (Canada) During upload, the applicant must provide the photographer or studio name, photographer or studio address, and the date taken. Visitor Visa, Study Permit and Work Permit Photos The generic temporary resident visa photo specification requires two photos with a frame measuring at least 35 mm wide by 45 mm high and a head height of 31 mm to 36 mm. They must have a plain white or light coloured background and a neutral expression. (Canada) For a paper study permit application outside Canada, write the applicant's name and date of birth on the back of both photos. If biometric fingerprints and a biometric photograph are required, paper photos do not need to be included. (Canada) The same applies to paper work permit applications outside Canada. (Canada) For online applications, IRCC generates a personalized document checklist. Upload a digital photograph only when the checklist requires it and follow the specifications displayed in that upload slot. There is no universal digital standard published for all online temporary resident applications. One confirmed exception is International Experience Canada (IEC) work permits. The IEC digital standard requires a final composition of at least 35 mm by 45 mm, a head height of 31 mm to 36 mm, and at least 420 by 540 pixels. The file should be JPEG or JPEG2000, ideally approximately 240 kB and not less than 60 kB. (Canada) Biometrics Photograph versus Application Photograph A biometric photograph is taken at the biometric collection appointment and is not the same as the professional photograph uploaded or mailed with an application. The biometrics fee (currently CAN$85 for an individual) covers the collection of fingerprints and the biometric photo. It does not pay for a commercial photographer to prepare an application or passport photograph. (Canada) Questions People Actually Ask Q: Can I use a phone selfie for my PR Portal photo, or must it be taken by a professional photographer? You cannot use a phone selfie. IRCC requires the photo to be taken by a commercial photographer or professional studio. You can use an original professional digital photograph or scan a professionally printed photograph. Q: For a digital PR application, do I need to upload the back of the photo or a stamped photographer receipt? Yes, the portal has separate fields for the front and the back of the photo. If you use an original digital photograph, you must upload a supporting document as the "back" that includes your name, date of birth, date the photo was taken, studio name and address, and a confirmation from the studio like a receipt. If you scan a printed photo, you scan the back of the photo showing the required information. Q: I scanned the front and back of my professional photo as separate JPEG files. Is that the correct way to upload it? Yes, the portal has separate upload fields for the front image and the supporting document for the back. Q: Why does the PR portal say my professionally taken photo is too bright or too dark? The portal has an automated preview that sometimes displays warnings for brightness, background or pixel range. It may also turn your colour photo black and white. This is not a technical problem. You can still submit the photo after acknowledging the warning, and an officer will make the final decision. Q: For an online citizenship application, should I upload the photographer's original digital file or a scan of the printed citizenship photo? IRCC prefers the original digital file directly from the photographer because it is safer and ensures minimal compression. You may scan a professional printed photo if the photographer cannot provide a digital file. Details like these are where applications come apart. Our consultants have handled these documents for over a decade, and we can check yours before you file.Start Your Free Initial Eligibility Assessment Prepared by KGraph Immigration. Last updated July 2026. General information, not legal advice. Related Articles IRCC Secure Account Immigration Medical Exam Certified Translations Police Certificate Visiting Visa Service
Read More
Certified Translations for Canadian Immigration Accounts & Documents
Mar 26, 2026

Certified Translations for Canadian Immigration

Unless Immigration, Refugees and Citizenship Canada (IRCC) specifically tells you otherwise, every supporting document you submit in a language other than English or French must be accompanied by an English or French translation (ircc.canada.ca/english/helpcentre/answer.asp?qnum=018&top=4). In this guide What documents must be translated? What exactly should be submitted? What is a certified translator for IRCC purposes? Who may prepare the translation? Who cannot translate the documents? What is the translation affidavit? What is a certified photocopy? How to find and verify a certified translator Fees and costs Step by step process for applicants Common mistakes Questions people actually ask Welcome to the complete guide on getting certified translations for Canadian immigration. At KGraph Immigration, we have helped more than 10,000 clients successfully navigate the Canadian system, maintaining a 98% success rate and a 4.9 Google rating. One of the most common reasons for processing delays is submitting an incomplete translation package. Canada does not use a single universal translation rule for every application. The rules for Express Entry differ from the rules for family sponsorship, and both differ from study permit requirements. This page breaks down exactly what you need to submit, who can translate your documents, and how to avoid the most common mistakes. What documents must be translated? This rule applies to any foreign language document you submit as evidence. It is not limited to civil status documents. Depending on your application, this may include: Birth, marriage, divorce, adoption and name change documents Police certificates and court records Education records and transcripts Employment evidence Financial records and bank documents Identity and civil status documents Relationship evidence Letters, emails, text messages and social media conversations The individual document is only required when it appears on your application checklist or when you submit it voluntarily as supporting evidence. For spousal sponsorship, IRCC explicitly says that foreign language letters, printed text messages, emails and social media conversations used as proof of communication must also be translated (canada.ca/en/immigration-refugees-citizenship/services/application/application-forms-guides/guide-5289-sponsor-your-spouse-common-law-partner-conjugal-partner-dependent-child-complete-guide.html). The guide permits a maximum of 10 pages of proof of communication documents. IRCC also specifically confirms that a police certificate not issued in English or French must be translated and that translations by family members are not accepted (ircc.canada.ca/english/helpcentre/answer.asp?qnum=039&top=4). Bilingual documents and untranslated stamps A document does not need another translation merely because it originated in another country if the complete document is already in English or French. However, current IRCC instructions say the translation must cover all text appearing on the document, including letterhead, fine print, stamps and seals. Express Entry also says that stamps and seals not in English or French must be translated (canada.ca/en/immigration-refugees-citizenship/services/immigrate-canada/express-entry/apply-permanent-residence.html). A document that is mostly in English or French but contains an untranslated foreign language stamp, handwritten notation, seal, certification or fine print should therefore be treated as containing foreign language content. What exactly should be submitted? The safest central message is to submit the complete original language document with a complete English or French translation. Use a translator accepted by your exact IRCC program. Include the translator's stamp and membership number if certified, or a sworn affidavit if required. Include a certified photocopy whenever the program instructions require one or when the translator worked from that certified copy. Depending on the application program and the person who prepared the translation, your submission package may need: The document in its original language, or a certified photocopy of it. A complete English or French translation. The certified translator's seal or stamp and membership number. An affidavit from the translator if the translator is not recognized as certified under the applicable IRCC instructions. A certified photocopy of the original document where the program guide requires one or where the translator worked from a certified photocopy. IRCC's general Help Centre says to provide the translation, an affidavit and a certified photocopy (ircc.canada.ca/english/helpcentre/answer.asp?qnum=018&top=4). The IRCC glossary and several current program guides say that an affidavit is required only when the translator is not certified (canada.ca/en/services/immigration-citizenship/helpcentre/glossary.html). Express Entry also has more specific rules about when an original scan versus a certified photocopy is required. You should always follow the instructions for your exact application program and personalized document checklist rather than relying on one universal translation package. Route A: Translation by a recognized certified translator The safest package contains: A clear scan or copy of the complete original language document. The complete English or French translation. The translator's seal or stamp showing the membership number. The translation date. A certified photocopy if required by the program guide, checklist or because the translation was prepared from a certified photocopy. Any translation of the translator's foreign language stamp or seal. Under Express Entry, the translator should photocopy and stamp the original document if that is the document on which the translation was based. You must upload a scan of the original or the certified photocopy that the translator worked from. A certified photocopy is only required under the Express Entry wording if the translator worked from a certified photocopy. Express Entry also permits you to include a short scanned letter explaining that no affidavit is included because a certified translator was used (canada.ca/en/immigration-refugees-citizenship/services/immigrate-canada/express-entry/apply-permanent-residence.html). Route B: Translation by an uncertified translator The package should contain: The original language document or the certified photocopy from which the translation was prepared. The complete English or French translation. The translator's affidavit confirming language proficiency and accuracy. The notary or commissioner's execution of the affidavit. A certified photocopy where required by the program instructions. For Express Entry, both the source document and the translation must be referred to in the affidavit. What is a certified translator for IRCC purposes? IRCC's glossary and Express Entry instructions define a certified translator as a member in good standing of a professional translation association in Canada or abroad. Certification must be confirmed by a seal or stamp showing the translator's membership number (canada.ca/en/services/immigration-citizenship/helpcentre/glossary.html). A person who is still applying for certification or accreditation is not considered a certified translator for IRCC purposes. Important program specific differences Several program guides use a narrower definition. They describe a certified translator as a member in good standing of a Canadian provincial or territorial organization of translators and interpreters. Under these guides, a translation completed by anyone other than a Canadian certified translator requires an affidavit. Program Certified translator definition Express Entry A member in good standing of a professional translation association in Canada or abroad. The seal or stamp must display the membership number. Spousal and dependent child sponsorship A Canadian certified translator. A foreign or uncertified translator requires an affidavit. Study permit applications outside Canada A Canadian certified translator. A foreign or uncertified translator requires an affidavit. Visitor visa paper applications A Canadian certified translator. A foreign or uncertified translator requires an affidavit. Parents and grandparents sponsorship A Canadian certified translator. A foreign or uncertified translator requires an affidavit. Adult citizenship applications A Canadian certified translator. A foreign or uncertified translator requires an affidavit. Super visa applications A Canadian certified translator. A foreign or uncertified translator requires an affidavit. Where your checklist or document request gives different instructions, you must follow the checklist or request letter. Who may prepare the translation? 1Canadian certified translator A Canadian certified translator is normally a member in good standing of a provincial or territorial professional organization. The translated document should carry the translator's seal or stamp and a verifiable membership number. Current IRCC instructions also say the translation should: Follow the same order as the original document Include every piece of text Include the letterhead, fine print, stamps and seals Include the date the translation was completed 2Certified translator outside Canada Express Entry and the IRCC glossary recognize members in good standing of professional translation associations abroad, provided certification is shown by a seal or stamp containing a membership number. For other programs, the foreign translator may need to provide a sworn affidavit even if the translator is professionally certified in that country because the program guide only exempts Canadian certified translators. 3Uncertified translator Several IRCC guides allow a person who is fluent in both the original language and English or French to complete the translation. When the translator is not a Canadian certified translator, the translator must provide an affidavit swearing to their language proficiency and the accuracy of the translation. Express Entry says the affidavit route should be used only when a translation cannot be completed by a certified translator. 4Translation agency versus individual translator IRCC's requirements attach certification to the individual translator's membership, seal or stamp and membership number. Using a business that calls itself a certified translation agency is not enough unless the translation is completed or certified by an individual who satisfies IRCC's requirements. Who cannot translate the documents? IRCC does not permit you to translate your own documents. IRCC also prohibits translations by your parent, guardian, sibling, spouse, common law partner, conjugal partner, grandparent, child, aunt or uncle, niece or nephew, and first cousin. For Express Entry, a family member, immigration representative or consultant cannot translate your documents even if that person is also a lawyer, notary or translator. A translation produced only through Google Translate or another automated translation tool would not independently satisfy these requirements because there would be no eligible translator providing the required certification or sworn affidavit. What is the translation affidavit? An affidavit for a translation is a sworn document stating that the translation is a true and accurate representation of the contents of the original document. The translator swears to the accuracy of the translation before a person authorized to administer oaths (ircc.canada.ca/english/helpcentre/answer.asp?qnum=040&top=4). What the affidavit must establish Current IRCC instructions indicate that the affidavit should confirm the translator's proficiency in the original language and English or French, that the translation is true and accurate, and the connection between the translation and the source document. For Express Entry, both the translated document and the original document from which the translation was prepared must be referred to in the affidavit. Who may take the affidavit? In Canada, the translator may swear the affidavit before a notary public, a commissioner of oaths, or a commissioner of taking affidavits. Outside Canada, the affidavit may be taken by a notary public or equivalent person authorized under local law. For Express Entry, IRCC says the commissioner or notary administering the oath must be proficient in English or French. The affidavit cannot be taken by you or by your listed family members, even when that person is a lawyer, notary or authorized translator. There is no dedicated IRCC translation affidavit form or IMM form number in the current official instructions. The affidavit is prepared by the translator or legal professional and sworn before the authorized person. IRCC does not publish a general expiry period for a translation affidavit or certified translation. However, the underlying document may expire or be subject to a recency rule. A new translation may also be necessary if a document is reissued, corrected, amended or contains information not included in the existing translation. What is a certified photocopy? A certified photocopy is a readable photocopy that an authorized person has compared with the original and certified as a true copy (canada.ca/en/services/immigration-citizenship/helpcentre/glossary.html). The authorized person must place the following information on the copy: Their name and signature Their position or title The name of the original document The certification date The phrase: "I certify that this is a true copy of the original document" In Canada, a notary public, a commissioner of oaths, or a commissioner of taking affidavits may certify a photocopy. Authority varies by province and territory. Outside Canada, the authorized person depends on local law. A notary public may be authorized, but IRCC tells applicants to check with the relevant local authority. You and your listed family members cannot certify the copy. A certified translation verifies the accuracy of the English or French translation. A certified photocopy verifies that a photocopy matches the original document. An affidavit is the translator's sworn statement of proficiency and accuracy when required. One does not automatically replace the others. How to find and verify a certified translator The Canadian Translators, Terminologists and Interpreters Council (CTTIC) represents provincial translation associations. CTTIC states that certification is administered at the provincial and territorial level and lists its seven member societies, covering British Columbia, Alberta, Saskatchewan, Manitoba, Ontario, New Brunswick and Nova Scotia (cttic.org/member-societies/). In Ontario, ATIO provides a public Certified Translator Directory searchable by source language, target language and location (atio.on.ca/directory/translator/). In Quebec, OTTIAQ provides a public directory searchable by profession, source language, target language and specialization (ottiaq.org/en/directory). What to verify before paying Ask for and independently verify: The translator's full name The professional association Current membership status Membership number Certified language direction, such as Arabic to English Whether the final translation will carry the seal or stamp and membership number Whether the service includes an affidavit or certified photocopy if required Whether every page, stamp, seal, handwritten note and reverse side will be translated Fees and costs IRCC does not publish a separate government fee for obtaining or submitting a certified translation. The translation service is arranged and paid for privately by you. There is no national government set translation price. Translators or agencies provide private quotes. Your quote may contain separate charges for translation, certification or translator's seal, additional pages, rush service, affidavit preparation, notary or commissioner service, certified photocopies, and courier delivery or printed originals. These vary by translator, language, location, document length and local notarial fee rules. You should request a current quote from the translator or agency. Step by step process for applicants Check the exact application guide. Identify the program, application portal and document checklist. Check country specific instructions where applicable. Identify every piece of foreign language content. Check the front and back of each document, stamps and seals, letterhead, fine print, handwritten notes, attachments, court or registry certifications, and foreign language text in an otherwise English or French document. Choose the appropriate translation route. Use either a certified translator accepted under the exact program instructions, or an eligible fluent translator who will provide a properly sworn affidavit. Give the translator the complete document. Provide a clear original, clear scan or certified photocopy according to the program requirements and the translator's professional procedures. Do not crop stamps, borders, signatures or reverse sides. Check the completed translation. Confirm that it is in English or French, follows the original order, includes all content, shows the translation date, has the required stamp or seal, shows the membership number, includes an affidavit where required, and correctly identifies the source document. Obtain a certified photocopy where required. Have the original compared with the copy by an authorized person. Make sure all required certification wording and identifying details appear on the copy. Assemble the upload package. A practical order is the original language document, certified photocopy if separate and required, English or French translation, translator certification page, affidavit and notarial or commissioner execution if required, and a short letter of explanation if needed. Check file format and size. Accepted formats depend on the IRCC account. File size limits vary by application system. IRCC permits only one uploaded file per document field. When several pages or documents belong in one field, they must be combined into one file. Common mistakes Submitting only the translation. IRCC generally requires the document in its original language or the certified photocopy from which the translation was prepared in addition to the translation. Missing the translator's membership number. For a certified translator, IRCC expects a seal or stamp showing the professional association membership number. Using a certification candidate. A translator who is still in the process of obtaining certification is not a certified translator for IRCC purposes. Leaving stamps or fine print untranslated. Current IRCC instructions require all text, including letterhead, fine print, stamps and seals. Using a family member. You and your listed family members cannot prepare the translation. For Express Entry, a representative or consultant cannot translate it either. Assuming notarization and certification are the same. A notary may certify a photocopy or witness an affidavit. This does not automatically make an uncertified person a certified translator. Assuming every foreign certified translator is affidavit exempt. Express Entry recognizes professional associations in Canada or abroad. Several other program guides only exempt Canadian certified translators. You must use the wording in the exact program guide. Uploading the translation separately from the source document. IRCC permits only one file in each upload field. The source document, translation and affidavit should normally be combined in the logical document slot. Cropping the document. A cropped scan can omit stamps, reverse side entries, certification wording or handwritten notes that must be translated. Translating only a summary. IRCC's current detailed instructions require all text in the same order as the original. A summary or partial translation does not meet that standard unless IRCC specifically requested an extract. Questions people actually ask Q: What is the normal procedure for translating documents? Does the original document also have to be notarized? The normal procedure depends on your specific application program. Generally, you provide the original document to a recognized translator. The original document does not always need to be notarized, but some programs require a certified photocopy of the original document. Q: Can certified translations be done in my country of origin, or do they have to be done by a translator in Canada? For Express Entry, a certified translator can belong to a professional association in Canada or abroad. For many other programs, such as spousal sponsorship or study permits, the guide specifies a Canadian certified translator. If you use a foreign translator for these programs, they must provide an affidavit. Q: My translator stamped every page, but the membership number was handwritten beside the stamp. Does the number have to be part of the stamp itself? IRCC requires the translator's seal or stamp to show the membership number. It is best if the number is part of the stamp, but the key requirement is that the membership number is clearly provided and verifiable. Q: Do I need to translate a document that is already in English if its logo, stamp or seal contains foreign language text? Yes. Current IRCC instructions require all text appearing on the document to be translated, including letterhead, fine print, stamps and seals. Q: If the translator is certified, do I still need an affidavit? If the translator is recognized as certified under your specific application program instructions, you do not need an affidavit. Q: Does a certified translator need to see the physical original, or can I email a scan? This depends on the translator's professional procedures and the application requirements. Many translators can work from a clear scan, but you must ensure you provide the complete document without cropping any parts. Q: Do I upload the original, the translation and a certified copy, or only the original and translation? You upload the original scan and the translation. You only need to include a certified copy if your specific program guide requires it or if the translator worked from a certified copy instead of the original. Details like these are where applications come apart. Our consultants have handled these documents for over a decade, and we can check yours before you file.Start Your Free Initial Eligibility Assessment Prepared by KGraph Immigration. Last updated July 2026. General information, not legal advice. Related Articles IRCC Photo Specifications Police Certificate Immigration Medical Exam Family Sponsorship Service IRCC Secure Account
Read More
How to Check Your IRCC Application Status Online Accounts & Documents
Mar 30, 2026

How to Check Your IRCC Application Status Online

Checking your Canada immigration application status can be confusing because Immigration, Refugees and Citizenship Canada (IRCC) does not have one single status system that covers every application. Depending on what you applied for and how you submitted it, you may need to use a specific secure account, portal, or tracker. In this guide The Different IRCC Status Channels Checking Status Through an IRCC Secure Account Application Status Tracker Client Application Status (CAS) Linking an Application to Your Secure Account Understanding Status Wording IRCC Processing Times Requesting GCMS Notes Through ATIP Using Authorized Representatives Common Mistakes Questions People Actually Ask At KGraph, we understand the anxiety of waiting for a decision. We have helped over 10,000 clients successfully navigate the Canadian immigration system, maintaining a 98% success rate and a 4.9 Google rating. This guide explains exactly how to check your status, what the different status updates mean, and what to do if you encounter technical problems. Always start by using the official IRCC status finder, which routes you to the correct system based on your specific application type (IRCC Status Finder). The Different IRCC Status Channels IRCC uses several different systems to provide application updates. You must use the system that matches your application type and submission method. Status Channel Main Use IRCC secure account Applications submitted or linked through GCKey or a Canadian Interac Sign In Partner IRCC Portal or IRCC Portal, new version Some visitor visa, study permit, asylum, and special measure applications Permanent Residence Portal Most non Express Entry permanent residence applications, family sponsorship submissions, PR cards, and permanent resident travel documents Application status tracker Detailed progress for supported Express Entry, family sponsorship, visitor visa, study permit, and work permit files Citizenship application tracker Citizenship grant applications after acknowledgement of receipt Client Application Status, or CAS A limited set of permanent residence, sponsorship, PR card, and citizenship applications Processing times tool A general estimate, not an individual case tracker Checking Status Through an IRCC Secure Account The IRCC secure account is accessed using either a GCKey username and password or a Canadian Interac Sign In Partner using credentials from a participating Canadian financial institution (IRCC Secure Account). You should normally return to the exact same account and sign in method you used to submit your application. Currently, IRCC directs Express Entry profiles and applications, work permits, post graduation work permits, International Experience Canada applications, visitor record extensions, study permit extensions, and citizenship certificates to the secure account (IRCC Accounts Routing). Once signed in, go to “View my submitted applications or profiles” and choose “Check status and messages.” The account can show the status of individual processing steps, messages and document requests from IRCC, letters issued by IRCC, deadlines for requested documents, medical and background information, and the final decision correspondence (IRCC Help Centre). The secure account is updated in real time. Application Status Tracker The application status tracker is separate from the secure account and provides detailed progress for supported applications, including Express Entry, family sponsorship, and some visitor visa, study permit, and work permit applications (IRCC Status Finder). To access the tracker, you will need your Unique Client Identifier (UCI), application number, principal applicant’s first and last name, date of birth, place of birth, and the email address matching the application. Updates usually appear only after IRCC issues the Acknowledgement of Receipt (AOR) following its completeness check (IRCC Help Centre). Client Application Status (CAS) Client Application Status, formerly called eCAS, is an older status tool that provides general case status updates. It supports a limited set of applications, including family sponsorship, permanent residence, permanent resident cards, and citizenship grants (IRCC Help Centre). CAS is updated daily, but it may not display some internal activities for many weeks and does not display some actions like security checks (IRCC Help Centre 1 | IRCC Help Centre 2). An application may not appear in CAS if IRCC has not started processing it, the application type is not supported, or IRCC has already removed the completed application from the system. Linking an Application to Your Secure Account If you applied on paper or through another method, you may be able to link your application to an IRCC secure account. Linkable applications include Express Entry profiles, most permanent residence classes, family sponsorship (excluding the application to become a sponsor), permanent resident cards, study permits, visitor visas, and work permits (Link Paper Application). To link an application, sign in to your secure account, select “Add (link) your application to your account to check your status,” choose the correct application category, and enter your information exactly as it appeared on the original application. You will need your application number, your UCI, and your personal details. For permanent residence applications, principal applicant information may come from the Generic Application Form for Canada, IMM 0008 (Guide IMM 0008). For family sponsorship, the system asks for the number of family members included in the application. This count must include the sponsor and the co signer, meaning the number will be at least 2 (IRCC Help Centre). You have five attempts to link an application before the account is locked for 24 hours. Understanding Status Wording Status wording varies by application type and system. Do not treat every phrase as a final result. Wording Official Meaning Received IRCC received the application and is checking whether it is complete In progress, overall IRCC is still reviewing the application Closed IRCC approved or refused the application, or the applicant withdrew or abandoned it Not started, section IRCC has not started reviewing that section Waiting on you IRCC needs information or documents from the applicant In progress, section IRCC is still reviewing that section Completed, section IRCC finished reviewing that section Exempted That section is not required for the application In the application status tracker, "Completed" officially means IRCC has finished reviewing that particular section. It does not mean the complete application has been approved. Approval or refusal must be confirmed through IRCC’s final message, letter, passport request, permit document, or confirmation of permanent residence (IRCC Help Centre). “We sent you correspondence” means IRCC issued a communication connected to the application. It does not reveal what the communication says. You must sign in to your account and open the letter to see if it is a request, notice, approval, or refusal (IRCC Help Centre). IRCC Processing Times The official IRCC processing times tool provides an estimate for an application category (IRCC Processing Times). It is not an individualized status report. Processing time starts when IRCC receives a complete application and ends when a decision is made. It includes the time needed to give biometrics. A file may exceed the displayed time if the application is incomplete, complex, requires additional security review, or if documents are difficult to verify. Calling IRCC does not make the application process faster. Requesting GCMS Notes Through ATIP “GCMS notes” is the common name for electronic case records and officer notes from IRCC’s Global Case Management System. You can request these records through an Access to Information Act or Privacy Act request. An Access to Information Act request can be made by a Canadian citizen, permanent resident, or an individual or corporation currently in Canada (ATIP Request Info). The fee is exactly CAN$5 per request. If requesting another person’s information, you must include the Consent for an Access to Information and Personal Information Request, IMM 5744 (Form IMM 5744). A Privacy Act request has no fee and allows anyone to request their own personal information regardless of location (Privacy Act Request). Electronic requests must be filed through the ATIP Online Request portal (ATIP Online Portal). The legislated response period is 30 calendar days, though extensions may apply. IRCC now automatically includes officer decision notes with refusal letters for most temporary resident applications refused since July 29, 2025, and most permanent residence applications refused since May 26, 2026 (Officer Decision Notes). Using Authorized Representatives If you use a paid immigration representative, they must be authorized and in good standing. You must submit the Use of a Representative form, IMM 5476, to appoint, update, cancel, or withdraw a representative (Form IMM 5476). The Authority to Release Personal Information to a Designated Individual, IMM 5475, lets a designated person obtain status information but does not allow them to conduct business with IRCC. Representatives check status through specific portals. If you link an application managed by a representative to your own secure account, the representative will lose online access to that application. Common Mistakes Creating multiple accounts: Creating a new GCKey or changing your Sign In Partner can result in your application not appearing automatically. You should not create multiple accounts merely because a status is slow to change. Miscounting family members when linking: For family sponsorship, the family member count must include the sponsor and the co signer. This is a frequent reason for “no applications found” errors. Assuming “Completed” means approved: In the tracker, “Completed” simply means IRCC finished reviewing that section. It does not guarantee final approval. Guessing information when linking: Five unsuccessful linking attempts trigger a 24 hour lockout. You must enter information exactly as it appears on your passport or IMM 0008 form. Expecting CAS to show every step: CAS provides a general status and updates daily. It may not display internal activities like security checks for many weeks. Questions People Actually Ask Q: My background check says in progress in the tracker, but GCKey has not changed. Which one is correct? The secure account and the application status tracker update differently. The secure account shows individual steps and updates in real time, while the tracker provides detailed progress for supported applications. Always rely on the secure account for official correspondence and final decisions. Q: Why did my background verification change from completed back to in progress? IRCC describes background verification as checking the applicant’s background to ensure they are admissible to Canada. Statuses can change as IRCC verifies information, consults other offices, or reviews admissibility issues. A file can take longer than the normal estimate if background checks remain in progress. Q: All four sections in my application tracker say completed. Does that mean my application is approved? No. “Completed” officially means IRCC has finished reviewing that particular section. Approval or refusal must be confirmed through IRCC’s final message, letter, passport request, permit document, or confirmation of permanent residence. Q: I received my AOR, but the account still says no applications found when I try to link my sponsorship application. What am I entering wrong? IRCC identifies three main causes for this error: the application is not yet in the system, the wrong category was selected, or the information does not exactly match IRCC’s record. For family sponsorship, ensure your family member count includes the sponsor and the co signer. Q: eCAS says decision made, but there is no letter, passport request, email, or update in GCKey. How long does it take? In CAS, “Decision made” indicates that a decision has been entered, but you must read the subsequent communication to determine the outcome. It can take time for the official letter or passport request to appear in your secure account or arrive by mail. Q: I received an email saying my application was updated, but there is no visible change in the account. What does that mean? Sometimes an application is updated internally without a visible change in the portal. A static status does not establish that nothing is happening. A file may be waiting in the initial review queue, or checks not displayed in the system may be continuing. Not sure which pathway is right for you? Our team has spent more than ten years working through cases like yours, and we can tell you where you actually stand.Start Your Free Initial Eligibility Assessment Prepared by KGraph Immigration. Last updated July 2026. General information, not legal advice. Related Articles IRCC Secure Account Immigration Medical Exam Biometrics from Outside Canada Express Entry Service Visiting Visa Service
Read More